Table of Contents
Introduction
Weather monitoring is not only a fascinating hobby but also a practical tool for understanding local climate trends. With the versatility of the Raspberry Pi, you can create a personalized weather station that collects data from various sensors and presents it in real time. This DIY project offers endless learning opportunities—whether you’re passionate about electronics, programming, or meteorology. In this article, we will explore every facet of building a Raspberry Pi Weather Station, from selecting the right hardware to visualizing your data online.
Also Read: Essential Guide to Laptop Repair and Maintenance: Tips to Enhance Performance and Longevity
Why Build a Raspberry Pi Weather Station?

Creating your own weather station opens up a world of possibilities:
- Real-Time Data Collection: Monitor temperature, humidity, barometric pressure, wind speed, and more in your own backyard.
- Customization: Tailor your setup to include only the sensors you need.
- Educational Experience: Learn valuable skills in electronics, coding, and data analysis.
- Community Engagement: Share your findings with local communities or online platforms.
- Cost-Effective: Build a sophisticated system without breaking the bank by leveraging affordable Raspberry Pi models.
Understanding the Core Components

Before diving into the assembly and coding, it’s crucial to understand the key components involved in building your weather station.
Hardware Essentials
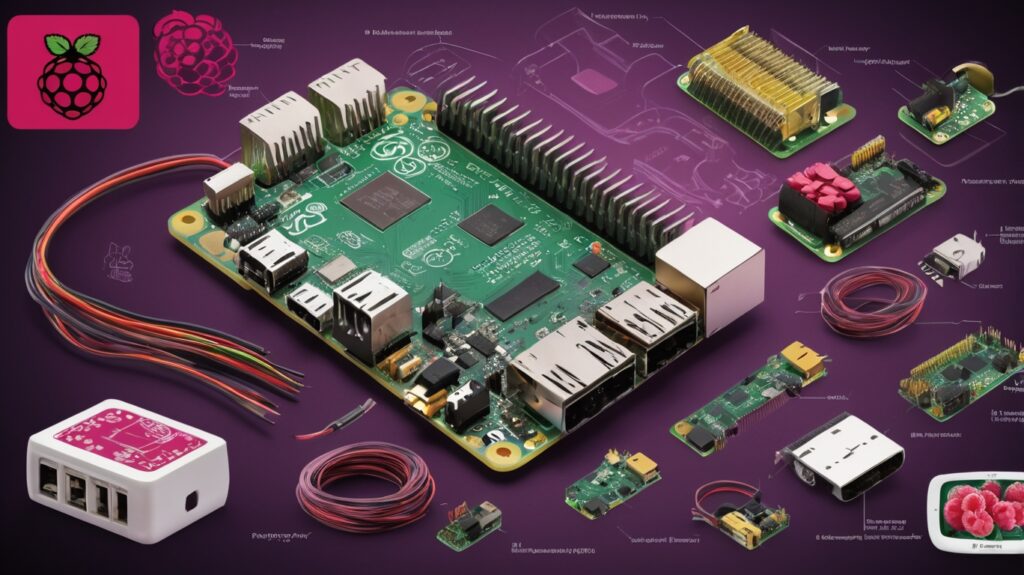
A robust Raspberry Pi weather station typically includes:
- Raspberry Pi Board: Any model works, but newer models like the Raspberry Pi 4 offer improved processing capabilities.
- MicroSD Card: At least 8GB of storage for the operating system and software.
- Power Supply: Ensures a stable power source for uninterrupted operation.
- Weather Sensors: The heart of the station, including sensors for temperature, humidity, pressure, wind, and rainfall.
- Connecting Wires and Breadboard: For assembling and testing circuits.
- Weatherproof Enclosure: To protect sensitive components from harsh outdoor elements.
- Optional Add-ons: Consider including an LCD screen for local readouts, solar panels for power autonomy, or additional sensors like air quality monitors.
Software Essentials
Your weather station’s functionality is powered by software running on the Raspberry Pi:
- Operating System: Raspberry Pi OS (formerly Raspbian) or a compatible alternative.
- Programming Environment: Python is the go-to language, with libraries available for interfacing with various sensors.
- Web Server: Tools like Apache or Nginx can be used to display sensor data on a web-based dashboard.
- Data Management: Use lightweight databases such as SQLite or cloud-based storage solutions to archive your weather data.
Essential Sensors for Accurate Weather Monitoring

Accurate weather monitoring relies on choosing the right sensors. Below is an overview of common sensor types used in weather stations:
| Sensor Type | Function | Key Benefits | Considerations |
|---|---|---|---|
| Temperature & Humidity | Measures ambient temperature and moisture levels | Cost-effective and widely available | May require calibration for precision |
| Barometric Pressure | Monitors atmospheric pressure | Provides data for weather forecasting | Sensitive to environmental changes |
| Wind Speed & Direction | Gauges wind velocity and its directional flow | Essential for storm and climate analysis | Mechanical parts might wear over time |
| Rainfall Sensor | Tracks precipitation levels | Valuable for hydrological studies | Installation must ensure water resistance |
Using a combination of these sensors allows you to create a comprehensive snapshot of local weather conditions. Ensure that you select models compatible with your Raspberry Pi’s GPIO pins and that they offer reliable accuracy for your needs.
Step-by-Step Setup Process
A systematic approach is key to assembling a successful Raspberry Pi Weather Station. Follow these steps for a smooth setup:
- Prepare the Raspberry Pi:
- Install the latest Raspberry Pi OS on your microSD card.
- Configure your Raspberry Pi with necessary updates and security patches.
- Connect the Hardware:
- Attach the selected sensors to the appropriate GPIO pins.
- Use jumper wires and a breadboard to secure the connections.
- Place the Raspberry Pi and sensors in a weatherproof enclosure for outdoor deployment.
- Install Required Software:
- Set up Python and install necessary libraries (e.g., sensor-specific libraries).
- Configure a local web server if you plan to display data on a dashboard.
- Test Sensor Readings:
- Write or use pre-built scripts to read sensor data.
- Verify that each sensor is transmitting accurate information.
- Deploy and Calibrate:
- Mount your weather station in an unobstructed outdoor area.
- Regularly calibrate sensors such as wind direction indicators to ensure ongoing accuracy.
Programming and Data Processing

The programming phase is where your weather station truly comes to life. Here’s how to effectively manage data collection and processing:
Writing the Code
Utilize Python scripts to interact with your sensors. Here are some key points:
- Sensor Libraries: Make use of libraries designed for your specific sensors. For example, a library dedicated to temperature/humidity sensors can simplify data retrieval.
- Error Handling: Incorporate error-checking routines to manage sensor disconnections or data inconsistencies.
- Data Logging: Save sensor readings to a database or file system for future analysis. Consider timestamping each entry to track changes over time.
Data Visualization
Transform raw sensor data into actionable insights by visualizing it:
- Dashboard Creation: Use frameworks like Flask or Django to build an interactive web dashboard.
- Graphing Tools: Integrate libraries such as Matplotlib or Plotly to display data trends in charts and graphs.
- Remote Access: Configure your Raspberry Pi as a web server so that you can access your weather data from any device.
Example: Data Logging Script
Below is a simplified example of how a Python script might log data:
import time
import sqlite3
from some_sensor_library import read_sensor_data

# Connect to SQLite database
conn = sqlite3.connect('weather_data.db')
cursor = conn.cursor()

# Create table if not exists
cursor.execute('''
CREATE TABLE IF NOT EXISTS weather (
    timestamp DATETIME DEFAULT CURRENT_TIMESTAMP,
    temperature REAL,
    humidity REAL,
    pressure REAL
)
''')

while True:
    data = read_sensor_data()  # Replace with actual sensor reading function
    cursor.execute('INSERT INTO weather (temperature, humidity, pressure) VALUES (?, ?, ?)',
                   (data['temp'], data['humidity'], data['pressure']))
    conn.commit()
    time.sleep(60)  # Log data every minute
Note: This is a simplified snippet; real-world applications might require more robust error handling and optimization.
Enhancing Your Weather Station

Once you have the basics set up, consider these enhancements to add more functionality and reliability:
- Remote Monitoring: Integrate with platforms such as ThingSpeak or create your own online dashboard.
- Power Solutions: Use solar panels combined with rechargeable batteries to ensure continuous operation in remote areas.
- Additional Sensors: Incorporate extra sensors like air quality monitors or lightning detectors for a more comprehensive overview.
- Mobile Alerts: Set up SMS or email notifications for extreme weather conditions.
Best Practices for Enhancements
- Modular Design: Build your system so that new sensors or features can be added without overhauling the entire setup.
- Data Backup: Regularly back up your data to cloud services or external storage to prevent loss.
- Security Measures: Secure your Raspberry Pi and web dashboard with strong passwords and, if possible, two-factor authentication.
Visualizing and Analyzing Weather Data
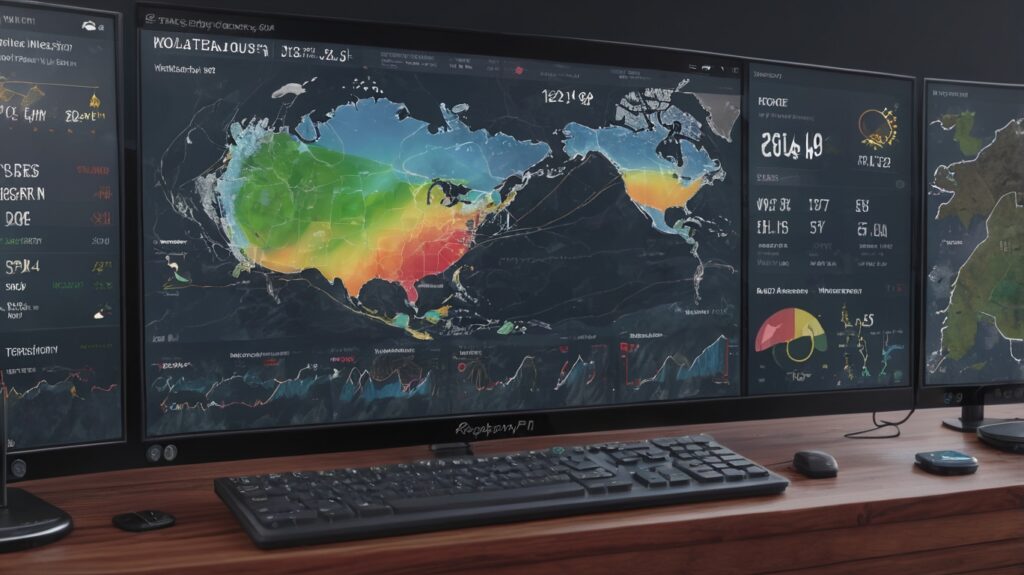
Effective data visualization transforms raw numbers into meaningful insights. Here are some tips and techniques:
- Interactive Dashboards: Create dashboards that allow users to filter data by time period or sensor type.
- Real-Time Graphs: Use real-time graphs to monitor live weather conditions.
- Comparative Analysis: Develop charts that compare data over days, weeks, or months to identify trends.
- User-Friendly Interfaces: Ensure that the dashboard is intuitive, with clear labels and legible fonts, making it accessible to users of all ages.
Example: Monthly Data Overview
Below is an example layout of a data table summarizing monthly weather trends:
| Month | Average Temperature (°C) | Average Humidity (%) | Total Rainfall (mm) |
|---|---|---|---|
| January | 5.3 | 78 | 45 |
| February | 6.1 | 74 | 50 |
| March | 8.4 | 70 | 60 |
Using tables like this can help identify seasonal patterns and make data comparisons more straightforward.
Troubleshooting and Maintenance

Building and maintaining a DIY weather station involves periodic troubleshooting and upkeep:
- Regular Calibration: Sensors may drift over time. Regularly recalibrate sensors like wind direction indicators to maintain accuracy.
- Hardware Checks: Inspect wiring and sensor connections periodically to prevent corrosion or disconnections, especially in outdoor conditions.
- Software Updates: Keep your Raspberry Pi OS and sensor libraries up-to-date to take advantage of new features and security enhancements.
- Data Validation: Implement routines in your code to detect anomalies in sensor data, prompting maintenance checks if readings fall outside expected ranges.
Conclusion
Building a Raspberry Pi Weather Station is an engaging project that not only broadens your technical skills but also offers real-world insights into local climate patterns. By carefully selecting hardware, writing robust code, and integrating user-friendly data visualization techniques, you create a system that is both educational and highly functional. Whether you’re a hobbyist or a serious researcher, this project can serve as a platform for further innovation and community sharing. Embrace the challenge, and enjoy the process of turning raw sensor data into a story of your local weather!
FAQs
What are the basic components required to build a Raspberry Pi Weather Station?
A typical setup includes a Raspberry Pi board, microSD card, power supply, a selection of weather sensors (for temperature, humidity, pressure, wind, and rainfall), and connecting cables. A weatherproof enclosure is also recommended for outdoor use.
How difficult is it to set up a Raspberry Pi Weather Station for a beginner?
While the project involves some electronics and coding, numerous online tutorials and community forums can assist beginners. Start with a basic sensor configuration and gradually expand as your skills develop.
Which sensors provide the most accurate weather data?
Accuracy depends on your specific needs. Temperature and humidity sensors, as well as barometric sensors, are widely used due to their reliability. For wind data, selecting quality anemometers and ensuring proper calibration is key.
Can I monitor the weather station remotely?
Yes, by setting up a web server on your Raspberry Pi and configuring data logging with remote access protocols, you can view real-time data from anywhere using an internet-connected device.
How do I maintain and calibrate my weather station over time?
Regular maintenance involves checking sensor connections, recalibrating sensors to account for drift, updating software, and backing up data. Consistent upkeep ensures your weather station continues to provide accurate and reliable data.