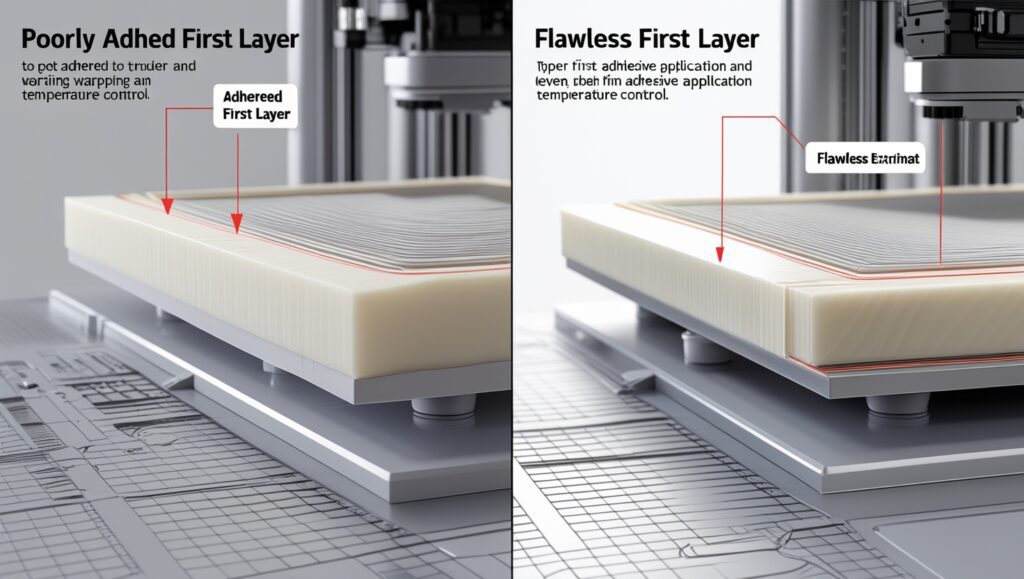
The first layer serves as the cornerstone of every high-quality 3D print, embodying the crucial interplay between mechanical precision and material science. A flawlessly executed first layer not only guarantees optimal adhesion to the print bed but also mitigates common issues such as warping or detachment, setting the stage for a seamless printing process. Mastery of bed leveling—a nuanced calibration procedure—is indispensable for achieving this foundation. This guide provides an exhaustive exploration of techniques and considerations essential for refining the first layer, merging technical acumen with practical insights for 3D printing practitioners.
Also Read: Affordable 3D Printing: The Best Budget 3D Printers of 2025
Table of Contents
Understanding the Basics of Bed Leveling

What Is Bed Leveling?
Bed leveling constitutes a precise calibration technique that ensures the planar alignment of the print bed with the trajectory of the nozzle across the X-Y plane. This intricate adjustment is paramount to establishing a uniform foundation, facilitating optimal filament adherence, and enhancing the structural integrity of the print. Mastering this process requires both technical aptitude and an appreciation for its nuanced effects on overall print fidelity. A consistently level bed is a prerequisite for averting adhesion deficiencies, structural deformities, and the broader spectrum of print anomalies.
- Why It Matters: The repercussions of an improperly leveled bed can manifest as a host of complications, including inadequate filament adhesion, distortion through warping, and even catastrophic failures such as “air printing,” wherein filament extrudes ineffectually into open space. These outcomes compromise not only the print’s viability but also the efficiency of the process. Proper leveling mitigates these risks, cultivating a reliable and reproducible workflow.
- Types of Bed Leveling: There are two principal methodologies employed in bed leveling, each presenting distinct advantages and considerations:
- Manual Leveling: This method entails the tactile adjustment of screws located beneath the print bed to refine its height at designated points. Though labor-intensive, manual leveling affords users meticulous control over the calibration, thereby enabling the precise rectification of unevenness. For practitioners invested in custom configurations or dealing with older hardware, this approach remains indispensable.
- Automatic Leveling: This advanced paradigm utilizes integrated sensor technology to quantitatively assess surface irregularities, dynamically adjusting nozzle positioning during the print. Automatic leveling significantly expedites the calibration process, offering unparalleled consistency and accuracy, particularly suited to high-throughput or intricate printing operations.
Manual Bed Leveling: The Traditional Approach

Manual bed leveling, though often perceived as labor-intensive, remains an indispensable technique for budget-friendly or legacy 3D printers. This approach necessitates meticulous attention to detail, offering a tactile and precise method for achieving an optimally leveled print bed.
Steps to Level Your Bed Manually
- Preparation:
- Thoroughly clean the print bed with isopropyl alcohol to eliminate contaminants, such as dust or grease, which can impede adhesion.
- Inspect and clean the nozzle, ensuring it is devoid of any residual filament or debris that could affect accuracy during calibration.
- Using a Calibration Tool:
- Employ a calibration instrument, such as a standard sheet of paper approximately 0.1 mm thick, as a tactile gauge.
- Adjust the nozzle height meticulously until it provides a slight resistance against the paper, ensuring uniform contact without excessive pressure.
- Adjust Each Corner:
- Sequentially position the nozzle at each corner of the print bed, carefully manipulating the adjustment screws to achieve the desired height.
- Recognize the interplay between corners, iteratively refining each adjustment to ensure global consistency across the bed.
- Verify the Center:
- Transition to the central region of the bed, conducting a comprehensive examination to confirm uniform leveling.
- Execute nuanced modifications as required to address any deviations detected during the process.
- Test Print:
- Initiate a diagnostic calibration print to empirically validate the leveling process. This step provides visual confirmation of the first layer’s uniformity and adhesion integrity.
By adhering to these methodical steps, practitioners can leverage manual bed leveling to establish a robust and precise foundation for their 3D printing endeavors.
Automatic Bed Leveling: Simplifying the Process

Modern 3D printers have increasingly adopted automatic bed leveling systems, a sophisticated innovation that significantly streamlines the calibration process while enhancing precision.
How Automatic Bed Leveling Works
- Setup:
- The process begins with the installation of an integrated sensor, often pre-included with the printer, which performs a series of measurements across the bed’s surface to ascertain its topographical nuances.
- Initial Z-offset calibration, typically executed with a feeler gauge or a piece of paper, ensures that the nozzle’s baseline height aligns appropriately with the print bed for optimal functionality.
- Probing and Calibration:
- During probing, the sensor collects a multitude of data points, mapping the bed’s unevenness with high precision. These measurements are subsequently interpreted by the printer’s firmware, which dynamically adjusts nozzle movements in real-time to compensate for surface irregularities.
- Advantages:
- Automatic bed leveling offers unparalleled consistency across a spectrum of print jobs, reducing variability introduced by manual interventions.
- This method substantially reduces setup time, proving particularly advantageous for frequent users or those engaged in high-throughput printing operations. Furthermore, it ensures reproducibility, a critical factor for complex or iterative projects.
Tips for Achieving the Perfect First Layer
- Level While Heated:
- Heat the bed and nozzle to your typical printing temperatures before leveling to account for thermal expansion. This step is particularly important as materials used in 3D printing, such as metal and glass, can expand or contract under heat, which may impact the leveling process. Ensuring the components are at operational temperature prevents discrepancies between the leveled and printing states, providing a more accurate adjustment.
- Use Calibration Prints:
- Test with a dedicated calibration pattern to evaluate adhesion and uniformity. Calibration prints are an excellent diagnostic tool to visualize inconsistencies, helping you identify problem areas such as regions where the filament isn’t adhering properly or where it’s too squished. Consider using popular test patterns like the “first layer test square” to fine-tune adjustments.
- Recheck Regularly:
- Periodically re-level the bed, especially after moving the printer or noticing quality issues. Frequent rechecking ensures that minor shifts or wear and tear do not accumulate into significant issues. For heavy users, this might mean weekly checks; occasional users may find monthly adjustments sufficient. Always inspect the leveling after major events like transporting the printer or changing bed surfaces.
- Optimize Surface Preparation:
- Use appropriate adhesives, such as glue sticks or painter’s tape, for enhanced adhesion. Proper surface preparation can drastically improve print success rates. For example, a glue stick can add an extra layer of tackiness to smooth glass surfaces, while painter’s tape offers a textured finish ideal for PLA filaments. Experiment with different methods based on the filament type and bed surface to find the optimal combination for your setup.
Common Troubleshooting Scenarios
Issue 1: Filament Doesn’t Stick
- Solution: Lower the nozzle closer to the bed by adjusting the Z-offset. If the nozzle is too high, the filament will not adhere properly to the bed, leading to issues like curling or detached prints. Double-check the nozzle height with a calibration tool, such as a feeler gauge or a piece of paper, to achieve the optimal gap. Consider also cleaning the print bed and ensuring it is free of dust and grease for maximum adhesion.
Issue 2: Uneven First Layer
- Solution: Recheck bed leveling, focusing on all corners and the center. Inconsistent leveling can lead to certain areas of the bed being higher or lower, causing uneven extrusion. Address this by performing a thorough manual leveling process, paying attention to potential discrepancies in the bed’s surface. For added precision, use a calibration print to identify problem zones and make micro-adjustments where needed.
Issue 3: Over-Adhesion
- Solution: Raise the nozzle slightly to prevent excessive squishing of the filament. Over-adhesion can cause the filament to spread too thin, making it difficult to remove the print from the bed or damaging the bed’s surface. To fix this, increase the Z-offset incrementally and test with a small print. Applying a release agent, like a glue stick, can also make removal easier while preserving print quality.
FAQs
How Often Should I Level My Bed?
Re-level the bed whenever you move the printer or notice adhesion issues. For frequent users, monthly checks are recommended.
What Tools Do I Need for Manual Leveling?
A standard piece of paper or a feeler gauge, isopropyl alcohol, and the printer’s adjustment screws.
Can I Switch Between Manual and Automatic Leveling?
Yes, many printers allow you to use both methods, although it’s best to follow the manufacturer’s recommendations.
What Is the Ideal First Layer Height?
Typically, the layer height should be between 0.1 mm and 0.2 mm, depending on the filament and print requirements.
Why Does Bed Leveling Fail?
Common reasons include loose screws, debris on the print bed, or incorrect Z-offset settings.
Conclusion
Perfecting your first layer is a blend of science and art. Whether you’re using manual or automatic leveling, attention to detail and consistent practice are key. By following this guide, you’ll achieve smoother prints, better adhesion, and fewer failed projects. Start leveling with confidence and watch your 3D printing skills soar!