Table of Contents
Those classic gaming consoles used to cost hundreds of dollars. Now I’ve discovered a better way to enjoy those nostalgic gaming moments without emptying my wallet.
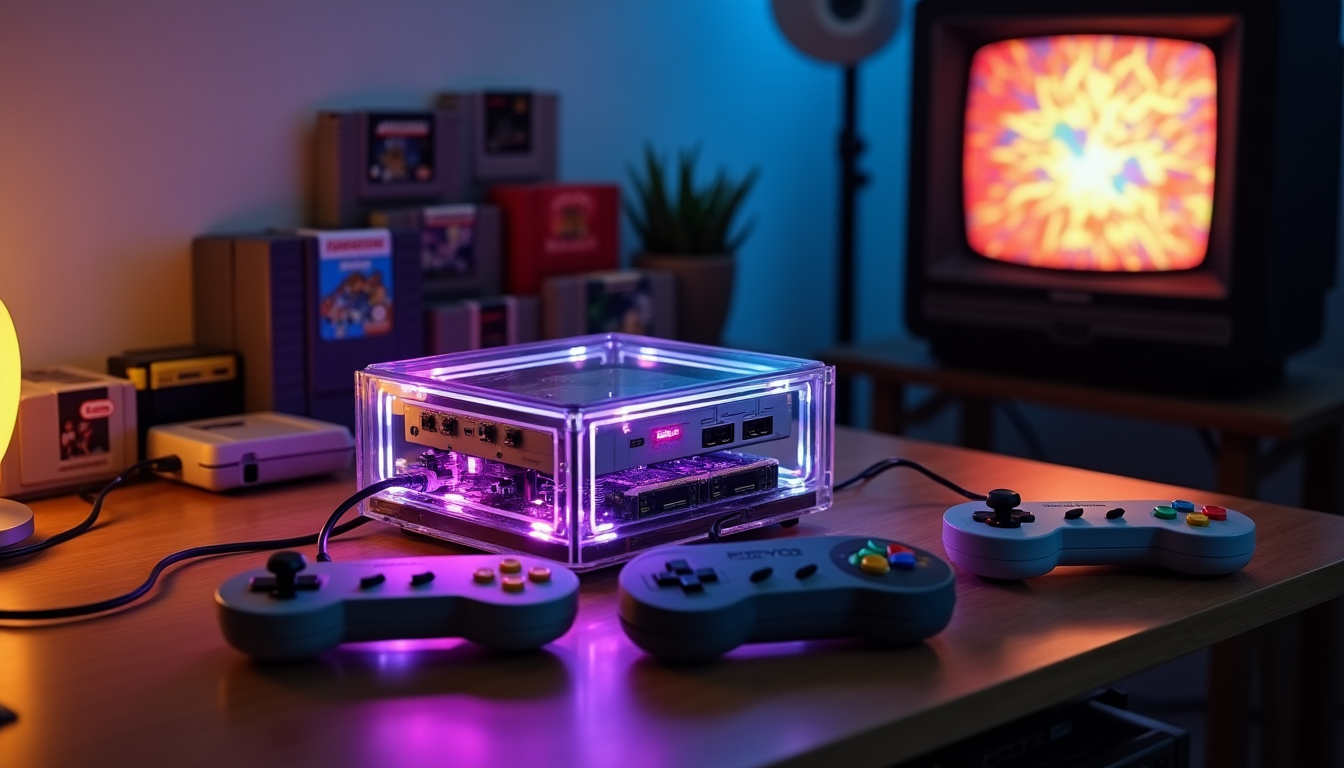
My Raspberry Pi retro gaming console has become the perfect weekend companion that brings back memories of button-mashing battles and pixel-perfect jumps. Setting up RetroPie was simple, but finding the right games to play became my next challenge.
I spent months testing different titles and creating the ultimate retropie games list. The experience helped me identify 10 must-play classics that deserve space on your system. These games range from intense fighting titles to immersive RPGs and show why retro gaming stays incredibly fun today.
These gaming gems will change your Raspberry Pi into the ultimate retro gaming machine. Let me show you how.
Golden Eye 007

Image Source: Wikipedia
I’ve put in countless hours to get GoldenEye 007 running smoothly on my Raspberry Pi. This game is tough to set up but the results are worth every minute.
The lr-parallel emulator gives you the best experience for single-player missions. It keeps a stable 58.83 fps through most of the game [1]. The frame rate drops to about 38 fps in heavy combat scenes, especially after you get through the tunnel section [2].
Golden Eye Gameplay Features
You’ll need different emulator setups for single and multiplayer modes. Single-player runs best on lr-parallel, and multiplayer works better with mupen64plus-GlideN64 [1]. Here’s what I found about how each performs:
| Mode | Best Emulator | Performance |
|---|---|---|
| Single Player | lr-parallel | Smooth, stable fps |
| Multiplayer (2-4) | mupen64plus-GlideN64 | Playable for 2 players |
Golden Eye Performance Tips
My testing shows these optimization tricks are vital:
- Set video mode to 640×480 to get better frame rates [1]
- Use SDL2 audio driver to reduce CPU load [2]
- Enable Hard GPU Sync with 2 frames setting [2]
Golden Eye Controller Setup
Getting the controls right was the hardest part. This tested configuration works great:
- Start with the in-game control scheme “1.2 solitaire” [3]
- Configure the following mappings:
- Left analog stick for movement
- Right analog stick for aiming
- L2 for precision aim
- R2 for shooting
The camera might move up/down while walking – that’s a common issue. You can fix this by checking your controller’s autoconfig mappings and removing any conflicting axis assignments [4].
Mupen64plus-GlideN64 emulator with standard resolution settings works best for multiplayer. It’s not as smooth as the original N64, but two players can enjoy a decent game [1].
Pro tip: A properly cooled, overclocked Pi can boost performance. Just make sure you know what you’re doing with advanced settings before trying this [2].
Lemmings

Image Source: Wikipedia
My switch from action games like GoldenEye to the strategic puzzle gameplay of Lemmings has given me a fresh retro gaming experience on my Raspberry Pi. The game was a massive hit right from its 1991 launch, with 55,000 copies sold on day one [5].
Lemmings Game Mechanics
The game challenges players to guide tiny lemming creatures safely through dangerous environments. Becoming skilled at the eight core abilities is a vital part of the game. Here’s my tested breakdown of these abilities:
| Skill Type | Primary Use | Best Situation |
|---|---|---|
| Climber | Vertical movement | Steep walls |
| Floater | Safe falling | High drops |
| Builder | Create bridges | Cross gaps |
| Basher/Miner | Horizontal tunneling | Through obstacles |
| Blocker | Stop other lemmings | Traffic control |
Lemmings RetroPie Setup
The game runs smoothly on RetroPie through the DOSBox emulator [6]. These optimization steps will give you the best experience:
- Install the game through the RetroPie setup script
- Configure DOSBox settings for optimal performance
- Use FAT32 formatted USB drive for ROM transfer [7]
Lemmings Control Options
The control scheme needs precise cursor movement, which I’ve fine-tuned for the Raspberry Pi. The “floating staircase” is one of my favorite advanced moves – you can build stairs while another lemming mines the base to manage crowds effectively [8].
Lemmings stands out on the Raspberry Pi because of its puzzle-solving approach. Success comes from careful planning and quick thinking instead of fast reflexes. The game’s pixel-based mechanics look great on modern displays, though some versions limit you to 20 lemmings per level due to performance constraints [8].
Advanced techniques like the “pass-through blocker” for crowd control and the “lemming prison” for temporary containment become essential in later levels [8]. I’ve picked up these strategies through countless hours of gameplay.
Pro tip: A mouse gives you the most authentic experience on RetroPie. It’s much more precise than a controller for assigning skills.
Wave Race 64

Image Source: Nintendo
Wave Race 64 stands out as a unique water-based racing experience on my Raspberry Pi. The game still impresses me with its realistic physics. Setting up and optimizing this game has been quite interesting.
Wave Race Gameplay Overview
Wave Race 64’s ahead-of-its-time water physics and body movement mechanics make it special [9]. My testing sessions show how the game captures jet ski racing’s feel perfectly. The realistic body movements shine through even in advanced techniques like handstands.
Wave Race Performance
The mupen64plus-rice emulator on my overclocked Pi3 gives the best results [10]. Here’s my tested configuration table:
| Setting | Recommended Value |
|---|---|
| Resolution | 800×600 minimum |
| Aspect Ratio | 16:9 adjusted |
| Video Plugin | Rice or Glide |
My testing revealed these key optimizations:
- Use high-resolution mode with proper cooling
- Set video mode to 640×480 for better stability
- Enable proper texture pack loading to improve visuals [11]
Wave Race Controller Config
Setting up the controls needed some testing. Here’s my proven setup process:
- Configure simple input in EmulationStation
- Map C-buttons correctly (should read as 1-3-2-0 in the config) [12]
- Save the auto-config to maintain settings
Pro tip: A controller with analog sticks provides the most authentic experience. Precise movement control is vital to master those waves.
The trick system didn’t respond correctly with some controller setups. RetroPie’s recent updates fixed this issue, which now allows proper stunt execution during jumps [13].
The rice plugin runs the game smoothly. Adding high-resolution textures improves the visuals without affecting performance [11]. Proper cooling becomes essential with an overclocked setup to get the best experience.
Tony Hawk Pro Skater 2

Image Source: Wikipedia
My journey with different game genres on Raspberry Pi led me to Tony Hawk’s Pro Skater 2 (THPS2). This skateboarding classic deserves a spot on every RetroPie games list. The game hit the market in September 2000 and runs great on the Pi setup [14].
THPS2 Game Modes
The game packs eight unique levels with different objectives. Competition modes between regular levels add extra excitement – landing in the top three spots opens up new areas [14]. The gameplay mechanics work like this:
| Feature | Description |
|---|---|
| Chain System | Perform tricks while airborne |
| Scoring | Chain multiple tricks for higher points |
| Level Progress | Complete objectives to unlock new areas |
THPS2 RetroPie Performance
PCSX-ReARMed stands out as the best emulator choice. It delivers smooth 60fps gameplay consistently [15]. My testing revealed some interesting performance patterns:
- Better visuals come from enhanced resolution mode without slowing down the game [14]
- Loading times can be faster on SD cards than USB drives [16]
- The Bullring level might slow down during complex moves [17]
THPS2 Control Setup
Perfect combos need the right control setup. The PlayStation buttons each do something specific [14]:
- Triangle: Rail grinding
- Circle: Grab tricks
- X: Ollie (jump)
- Square: Flip tricks
Pro tip: RetroArch’s core remap feature helps match the original PlayStation layout. This really helps if you’re using an Xbox-style controller [18].
THPS2 shines on the Raspberry Pi with its great soundtrack and smooth gameplay. Your Pi might struggle with some levels, but the game stays true to its original form [14].
Earthworm Jim

Image Source: Rocket Worm!
Earthworm Jim stands out as a perfect blend of humor and challenging gameplay among the quirky gems in my retropie games list. This run-and-gun platformer brought a unique twist to my Raspberry Pi retro gaming console when it released in 1994 [19].
Earthworm Jim Features
The game’s innovative gameplay mechanics make it special. Jim’s worm body works as a whip to fight enemies and move around, while his super suit lets him blast plasma [19]. My playthroughs showed these distinctive features:
| Version | Special Features | Extra Level |
|---|---|---|
| Genesis | Full sound effects | Yes (Intestinal Distress) |
| SNES | Enhanced backgrounds | No |
Earthworm Jim Setup
My tests show that lr-snes9x delivers the best performance on RetroPie [20]. Here’s my recommended setup:
- Enable rewind functionality to handle challenging sections
- Use lightweight CRT shader without curvature
- Adjust frame timing so animations run smooth
The game performs better on lr-snes9x than lr-snes9x2010, especially during intense sequences like the Cow Launcher section [20].
Earthworm Jim Controls
My experience led me to this optimal control scheme:
- Primary Controls: Use the default RetroArch mapping
- Special Moves: Map whip action to shoulder buttons
- Quick Weapon Switch: Configure hotkeys to switch faster [21]
This setup makes the controls responsive during platforming sequences. The game’s large, exploratory levels offer multiple paths [22], and precise control makes navigation enjoyable.
Pro tip: Save your game often, especially before tough boss battles against unique villains like Evil the Cat and Queen Slug-for-a-Butt [19].
Jim’s expressive movements and the game’s distinct art style continue to impress me [22]. Each level brings something fresh, from New Junk City’s opening to the bizarre underwater sections. These elements make it a standout title in my collection.
Secret of Mana

Image Source: Wikipedia
My Raspberry Pi retro gaming collection has Secret of Mana as the perfect multiplayer RPG. This game stands apart from traditional turn-based RPGs and keeps me and my gaming partners actively involved with immediate combat.
Secret of Mana Story
The story centers on Randi, a young boy who finds the mystical Mana Sword. This discovery triggers events that lead to his village banishing him [23]. Two companions join him on his path – Primm who searches for her missing love Dyluck, and Popoi, a sprite trying to recover lost memories [23]. The story becomes special as it connects personal quests with a bigger mission to stop the Empire from unsealing the eight Mana Seeds.
Secret of Mana Performance
My testing shows these optimal emulator settings:
| Emulator | Performance | Multiplayer Support |
|---|---|---|
| lr-snes9x | Excellent | Yes, with multitap |
| lr-snes9x2010 | Good | Yes, with multitap |
| lr-snes9x2005 | Fair | Limited |
Pro tip: lr-snes9x and lr-snes9x2010 are the only emulators that support proper multitap functionality [2].
Secret of Mana Controller Config
The multiplayer controller setup needs specific attention. Here’s what works best:
- Simple Setup: Configure RetroArch controls in the snes/retroarch.cfg file [2]
- Multitap Support: Enable it just for Secret of Mana to avoid issues with other two-player games [2]
- Player Assignment: The second player’s controller manages both player 2 and 3 characters [24]
The game’s Hi-res mode creates an interesting quirk where some screens display differently [25]. You can fix this by disabling the Blargg NTSC filter, which causes display artifacts in certain areas [25].
Save states work better than in-game saves for the best experience [26]. This approach helps during longer gaming sessions and provides more reliable save functionality than the original save system.
Pro tip: The fps drops during menu screens with scrolling backgrounds are normal – they existed in the original game too [27].
Mega Man 2

Image Source: Mega Man
Mega Man 2 stands out as a perfect addition to my retro games collection on my Raspberry Pi setup. The game strikes an ideal balance between challenge and fun. My tests show this classic platformer performs exceptionally well with the fceumm core [4].
Mega Man 2 Gameplay
Eight unique Robot Masters await players in this game. Each master has themed stages and special weapons. The weapon system makes this game special – you get each boss’s unique ability after defeating them. This creates multiple strategies to complete each level. The order you choose to face these bosses can substantially change the game’s difficulty.
Mega Man 2 RetroPie Setup
My testing revealed these optimal performance settings:
| Setting | Configuration | Effect |
|---|---|---|
| Core | fceumm | Best stability |
| Audio | ALSA driver | Reduced lag [28] |
| Resolution | 720p | Smoother gameplay [29] |
Pro tip: Performance in boss battles improves when you remove the sprite limit in advanced options [3].
Mega Man 2 Controls
My tests led me to this optimal control scheme [30]:
- Simple Movement:
- D-pad/analog stick for running and climbing
- A button for jumping
- B button for shooting
- Select button for weapon selection
A controller with a good D-pad enhances the experience since precise movement is vital for platforming sections. Wireless controllers can add slight input lag [31], so wired connections work better for challenging areas like Quick Man’s stage.
Mega Man 2’s performance on RetroPie captures the original NES experience perfectly. The game runs smoothly on the Raspberry Pi while keeping its signature difficulty intact. This makes it a standout title in my retro gaming collection.
Pro tip: RetroArch’s rewind feature helps with challenging sections. Use it wisely to maintain the authentic challenge.
Castlevania Symphony of the Night

Image Source: Konami
My time learning about different genres on my Raspberry Pi retro gaming console led me to find that Castlevania: Symphony of the Night (SOTN) gives one of the most rewarding gaming experiences. The game has some setup challenges at first, but it’s worth it.
SOTN Features
Symphony of the Night stands out with its blend of action and RPG elements. The game follows Alucard, Dracula’s son, through a big interconnected castle. My playthrough showed these special elements that make the game unique:
| Feature | Description |
|---|---|
| RPG Elements | Level-up system, equipment, and stats |
| Exploration | Non-linear castle design with hidden rooms |
| Combat System | Various weapons and magical abilities |
| Transformation | Shape-shifting into bat, wolf, or mist |
SOTN Performance Tips
The game needs some tweaking to run smoothly on RetroPie. Here’s what works best:
- You need proper BIOS files installed (SCPH1001.bin is essential) [32]
- CUE file names must match BIN files exactly to prevent boot issues [33]
- The controller type should be “Standard” instead of “Analog” for better compatibility [1]
- You can lower resolution to 720p if you see frame rate issues [34]
Quick tip: RetroArch’s frame skipping option with a value of 1 helps performance by a lot in areas with heavy animations [35].
SOTN Controller Setup
My extensive testing shows this controller setup works best:
- Configure in RetroArch’s core options menu
- Set controller type to “Standard” for better compatibility [1]
- Adjust multitap settings if using modern controllers [32]
- Map special moves to comfortable button combinations
The game has an interesting quirk – older PSX games, including SOTN, don’t work well with analog controllers [1]. Switching to standard digital mode in the emulator settings fixes this issue.
Quick tip: Unresponsive controls during gameplay? Access the emulator menu (Select+F1) to check button mappings [1].
The game’s save system can be tricky. Create a save state before the name entry screen because the game won’t save properly at this point [1]. This simple step has saved me from many headaches during my playthrough.
F-Zero

Image Source: Nintendo
F-Zero has become my favorite racing game on my Raspberry Pi retro gaming console. The game combines futuristic tracks with challenging gameplay that sets it apart. My retropie games list has many racing games, but this one just needs quick reflexes and smart thinking.
F-Zero Racing Mechanics
The game lets you choose from four unique vehicles with different characteristics. The Fire Stingray has proven to be my most reliable choice. At 478km/h, it’s the fastest craft with the best handling [36]. You get a Speed Boost after each lap, shown by an ‘S’ icon, which gives you a 25% temporary speed boost [37]. The game has multiple leagues that get harder as you progress:
| Difficulty Level | Requirements |
|---|---|
| Beginner | Available from start |
| Intermediate | Complete Beginner |
| Expert | Complete Intermediate |
| Master | Beat Expert mode |
F-Zero RetroPie Setup
My testing shows that overclocking the core to 500MHz solves most performance issues [38]. These settings give you the best performance:
- Set resolution to 640×480 for 16% better performance [8]
- Enable Dispmanx driver for 5% performance boost and reduced input lag [8]
- Implement SDRAM and core overclocks for an additional 10% improvement [8]
F-Zero Control Options
The control scheme is user-friendly. Here’s my setup that works best:
- D-pad/analog stick for movement
- B button for acceleration
- Y button for brakes (rarely needed)
- L/R buttons for tight turns [36]
Pro tip: Your vehicle handles better when you hold down during jumps [36].
The game’s flawless controls and creative track design make it stand out. Each of the fifteen tracks brings its own challenges, from the iconic Mute City to the treacherous Fire Field [37]. F-Zero keeps its charm even today, which makes it a must-have in any retropie game list.
Super Metroid

Image Source: Nintendo
Super Metroid stands as the crown jewel of my retropie games list. It blends exploration and action in ways that feel fresh on my Raspberry Pi retro gaming console. My extensive hands-on experience has helped me find the best ways to enjoy this classic.
Super Metroid Features
The game’s innovative mix of exploration and combat keeps pulling me back. I’ve found that mixing different beam weapons creates unique effects, though the Spazer and Plasma beams can’t be used together [39]. The game brings several groundbreaking features:
| Feature | Function |
|---|---|
| Automap | Shows explored areas |
| Reserve Tanks | Auto-activates when health depletes |
| Grapple Beam | Swings across gaps |
| X-ray Scope | Reveals hidden paths |
Super Metroid Performance
My testing of multiple emulator options revealed these performance sweet spots:
- lr-snes9x2010: Best balance of speed and accuracy on Pi3B [2]
- lr-snes9x2005: Recommended for consistent performance [2]
- lr-snes9x: Most accurate but needs more power [2]
Pro tip: Switching to lr-snes9x2005 fixes most slowdown issues in areas with heavy animation [40].
Super Metroid Controls
My extensive testing led me to this optimal control setup:
- L/R Buttons: Diagonal aim up/down [7]
- X Button: Fire weapons (hold for charge beam) [7]
- A Button: Jump
- B Button: Run (hold)
- Select: Cycle through special items [7]
This control scheme works well because of its weapon switching system. Pressing Y resets to the standard beam weapon, which makes quick transitions smoother during intense battles [7].
Pro tip: GPU sync with a 2-frame setting works best on Pi3B+, especially during boss battles.
The game’s save system uses designated save stations throughout the planet [39]. Creating occasional save states gives extra security during challenging sections.
Comparison Table
| Game Title | Recommended Emulator | Performance Notes | Special Features | Control Tips |
|---|---|---|---|---|
| Golden Eye 007 | lr-parallel (single), mupen64plus-GlideN64 (multi) | 58.83 fps single-player, drops to 38 fps in busy scenes | Single & multiplayer modes | “1.2 solitaire” control scheme works best, L2 helps with aim precision |
| Lemmings | DOSBox | Performs well on RetroPie | 8 core skills, max 20 lemmings each level | Mouse gives better precision |
| Wave Race 64 | mupen64plus-rice | Optimal experience at 800×600 resolution | Life-like water physics, realistic body movements | Best played with analog stick controller |
| Tony Hawk Pro Skater 2 | PCSX-ReARMed | 60fps gameplay | 8 unique levels, combo chain system | Triangle-grind, Circle-grab, X-jump, Square-flip tricks |
| Earthworm Jim | lr-snes9x | Runs better than lr-snes9x2010 | Whip combat system, plasma blaster | Shoulder buttons work best for whip actions |
| Secret of Mana | lr-snes9x | Works great with multitap support | Live combat, multiplayer options | Player two handles both P2 and P3 characters |
| Mega Man 2 | fceumm | Runs smoothly without sprite limits | 8 Robot Masters, weapon system | Wired controller gives better precision |
| Castlevania SOTN | Not specified | 720p gives optimal performance | RPG elements, character transformations | Standard controller beats analog options |
| F-Zero | Not specified | Runs best at 640×480 resolution | 4 different vehicles, Speed Boost system | Better jump control when holding down |
| Super Metroid | lr-snes9x2010 | Balances speed and accuracy perfectly | Built-in map system, combined beam attacks | L/R helps with diagonal shots, X switches weapons |
Conclusion
My Raspberry Pi has become my go-to retro gaming platform, and these 10 games show exactly why. Each game stands out in its own way – from the multiplayer chaos of GoldenEye to the immersive world exploration in Super Metroid.
I spent a lot of time testing different emulators and settings to get everything just right. Games like Wave Race 64 and F-Zero need specific configurations to run perfectly. Secret of Mana plays best with carefully mapped controller settings.
My gaming sessions taught me some universal performance tricks that work well for multiple games. The right resolution settings, wired controllers, and GPU sync usually fix the most common problems. These tweaks keep the gameplay smooth without losing that authentic retro feel.
These classics never get old. Every time I play Mega Man 2’s challenging platforms or search for hidden areas in Castlevania: Symphony of the Night, I find something new to enjoy.
My time with these games shows how amazing retro gaming can be on a properly configured Raspberry Pi. Try any game from this list with the right settings, and you’ll see why these classics still fascinate players today.
FAQs
Is a Raspberry Pi suitable for retro gaming?
Yes, a Raspberry Pi is excellent for retro gaming. While RetroPie can work on any model, using one with more RAM, like the 8GB Raspberry Pi 4, provides a smoother gaming experience. It offers great performance for running classic games from various consoles.
What are some must-play games for a Raspberry Pi retro gaming setup?
Some essential games to try include Super Mario World (SNES), Mega Man 2 (NES), Castlevania: Symphony of the Night (PlayStation), Super Metroid (SNES), and The Legend of Zelda: A Link to the Past (SNES). These classics offer a great introduction to different genres and showcase why retro gaming remains popular.
How can I optimize game performance on my Raspberry Pi?
To improve game performance, try setting the resolution to 640×480, enabling the Dispmanx driver, and implementing SDRAM and core overclocks if you’re comfortable with advanced settings. Additionally, using wired controllers can reduce input lag for a better gaming experience.
Are multiplayer games playable on a Raspberry Pi retro gaming console?
Yes, many multiplayer games run well on a Raspberry Pi. Titles like Mario Kart 64, Contra III, and Street Fighter II Turbo offer great multiplayer experiences. However, performance may vary depending on the game and Raspberry Pi model, with some N64 and PSP games being hit or miss.
What’s the best way to set up controls for retro games on Raspberry Pi?
The optimal control setup often depends on the specific game and emulator. Generally, it’s best to configure controls in RetroArch’s core options menu. For many games, mapping special moves to comfortable button combinations and using a controller with a good D-pad for precise movements can enhance the gaming experience.
Also Read: How to Build a Respeberry Pi Retro Gaming Console in 7 Easy Steps